
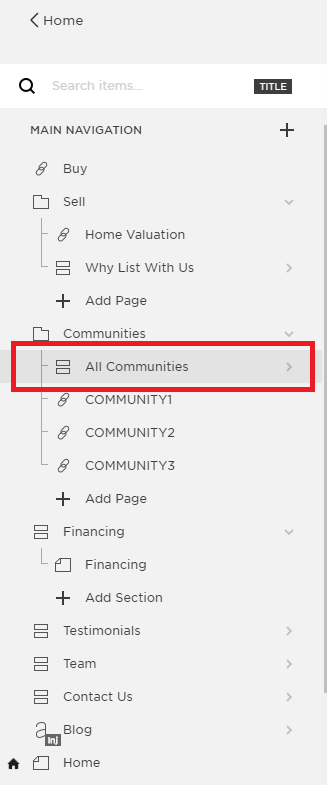
COMMUNITIES
For the Initial Draft site of the client, we can only set up a maximum of 25 communities. To start, click on the All Communities page.
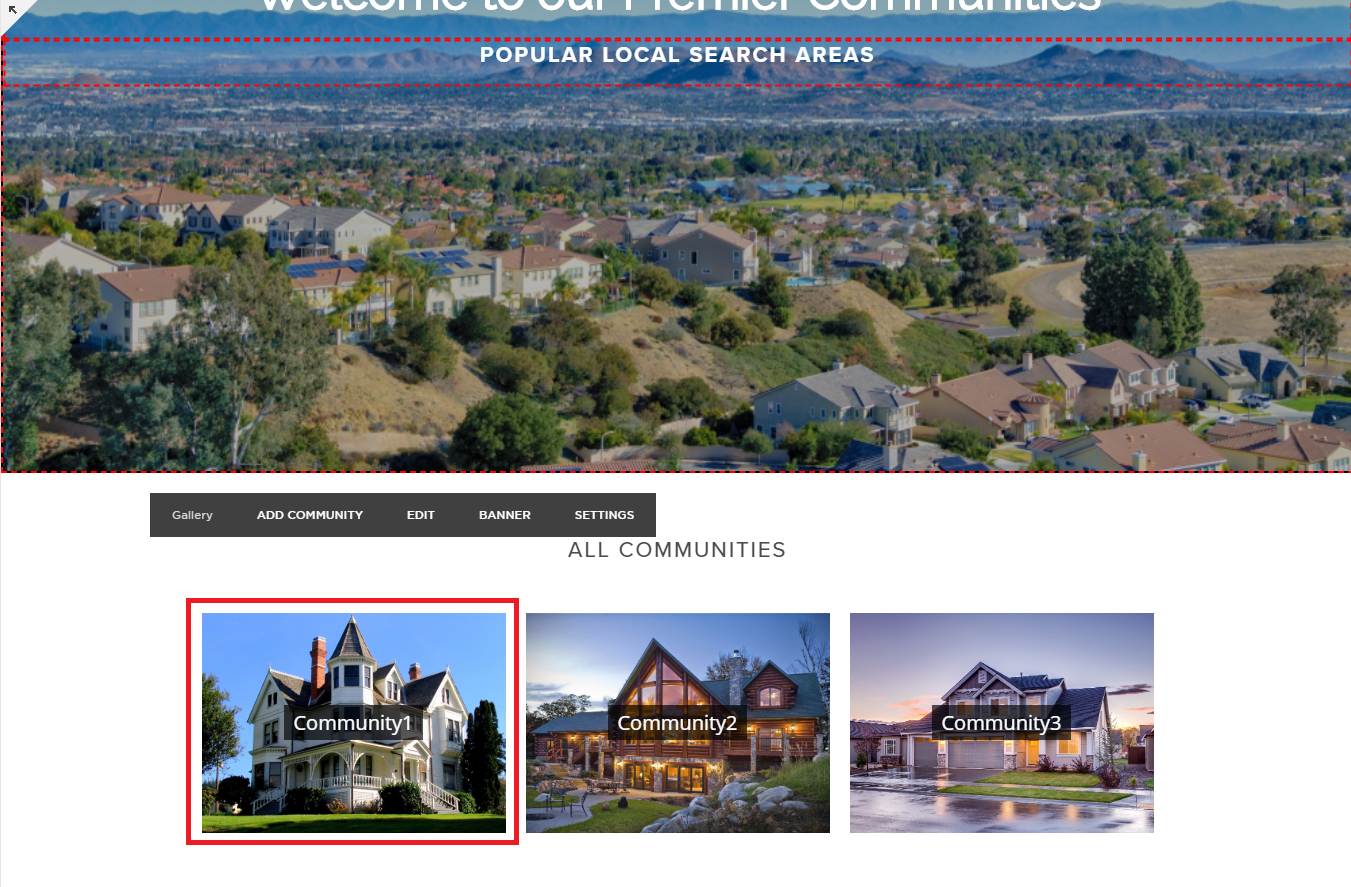
First thing to do here is to update the banner image of the page. Simply hover on the banner and click Banner.
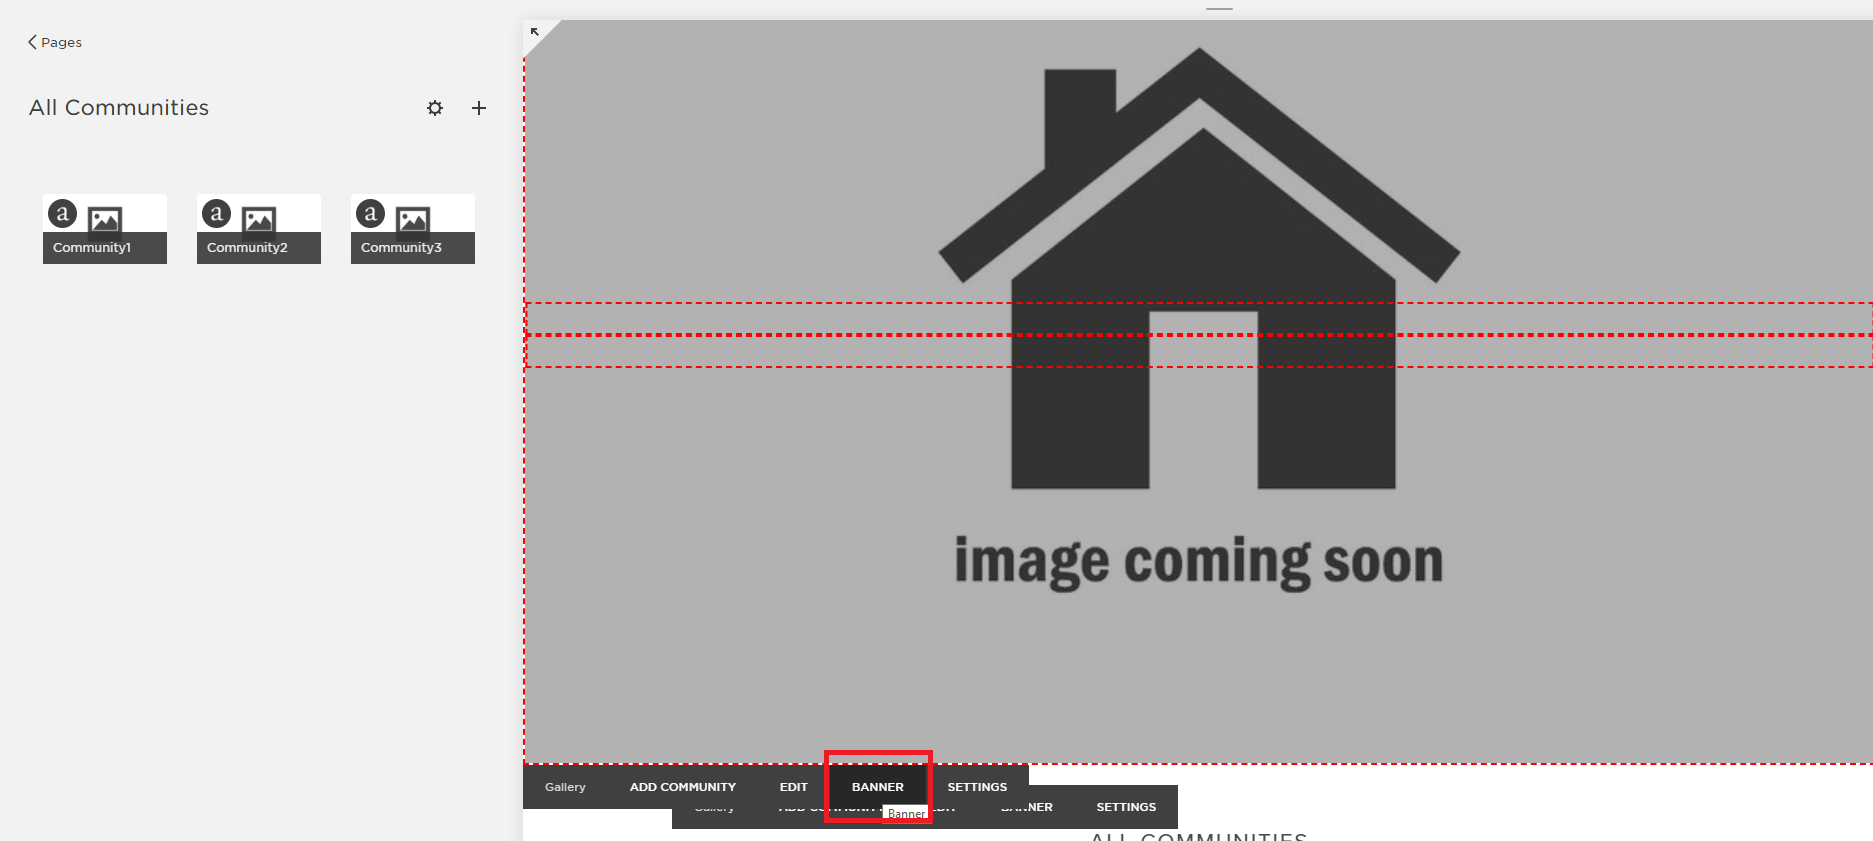
Use the same image you uploaded as banner images of the single agent pages and then Save.
Next, add the banner texts of the page.
Edit the Banner Headline, add the texts Welcome to our Premier Communities using Heading 1 and Bold Style.
On the Banner sub-headline, add the texts POPULAR LOCAL SEARCH AREAS in Heading 2 and Bold Style. Click Save.
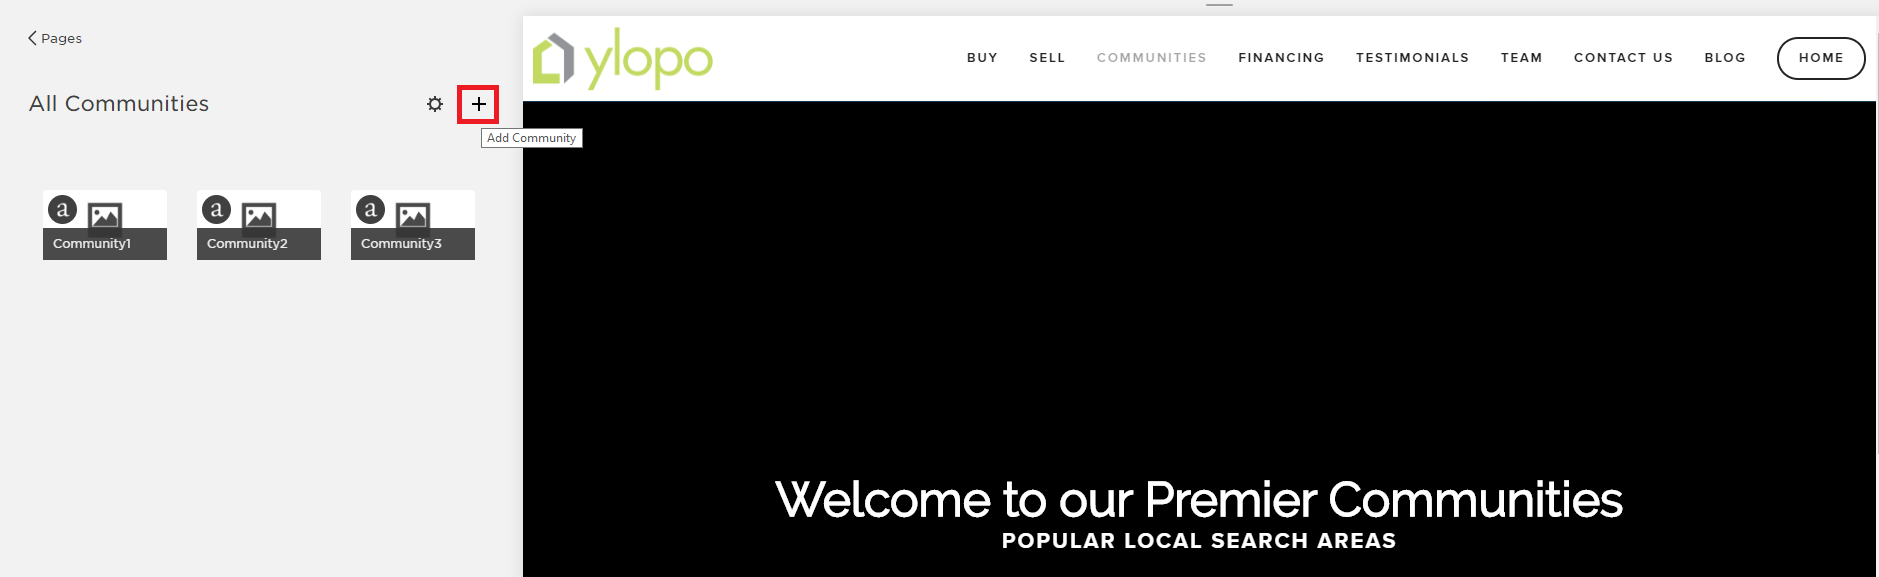
On the Communities page, we have three default community pages (similar to the team page) that we just need to edit and save. But for clients with more than 3 communities, we need to manually add new community pages by clicking the plus icon on the page.
Before editing a specific community page, it is advisable to first verify all the given areas on the client’s home search site. After verifying the areas and making sure that they are searchable on the home search site, we can start setting up the community pages.
To start, open the Community Tools Excel File (file will be sent to you via slack/email)

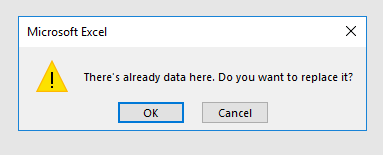
Copy all the primary and secondary communities from the Jira ticket separated by commas, paste it on the first row/column of the file and click START.

Upon clicking the Start button, a confirmation will pop up. Just select OK.
Next on the Excel file, click on the second tab named OUTPUT to view the generated details for the communities:
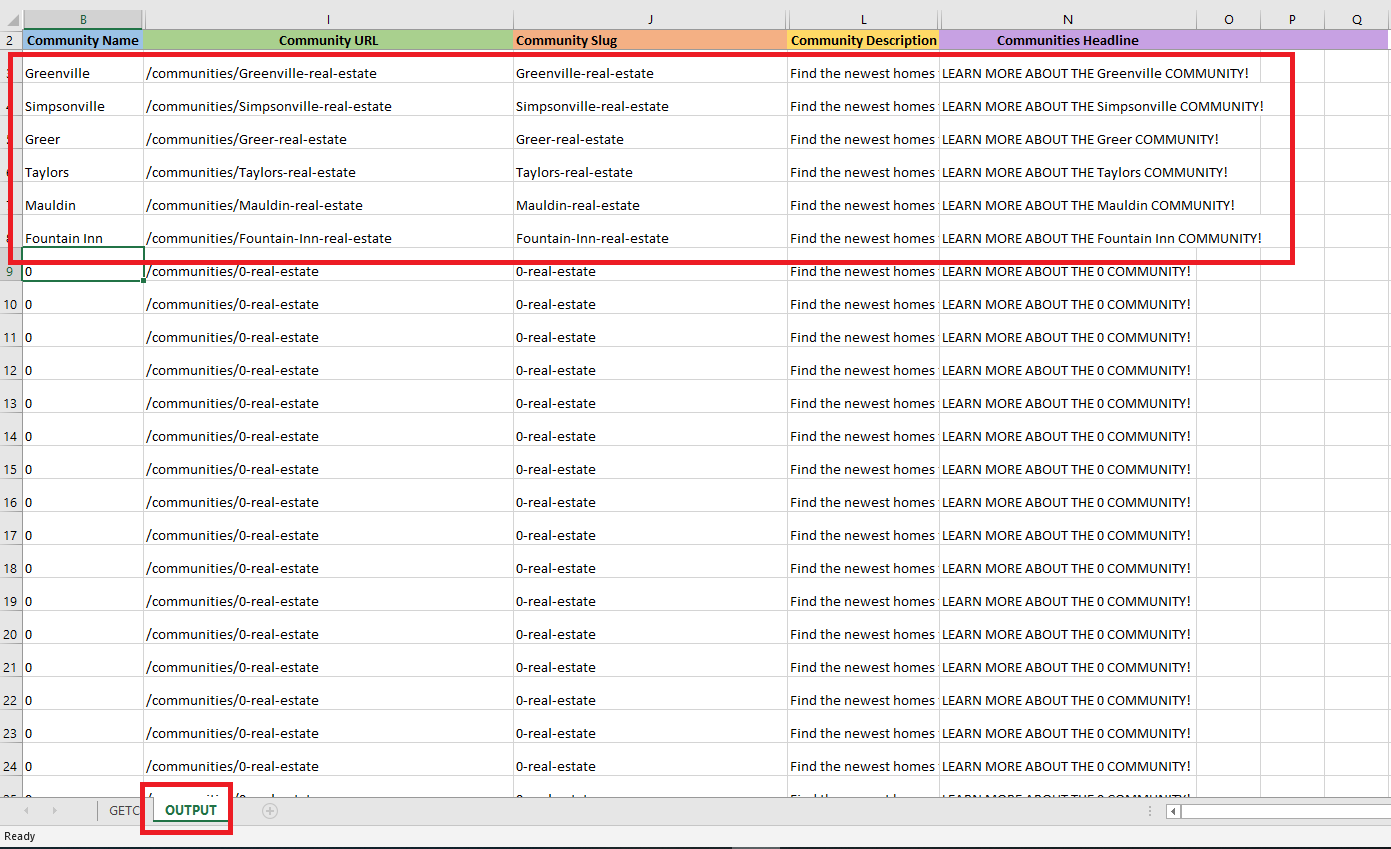
Generating these details using the excel file tool will make the process easier as we just have to copy-paste the details from this when editing the community pages on the Squarespace site.
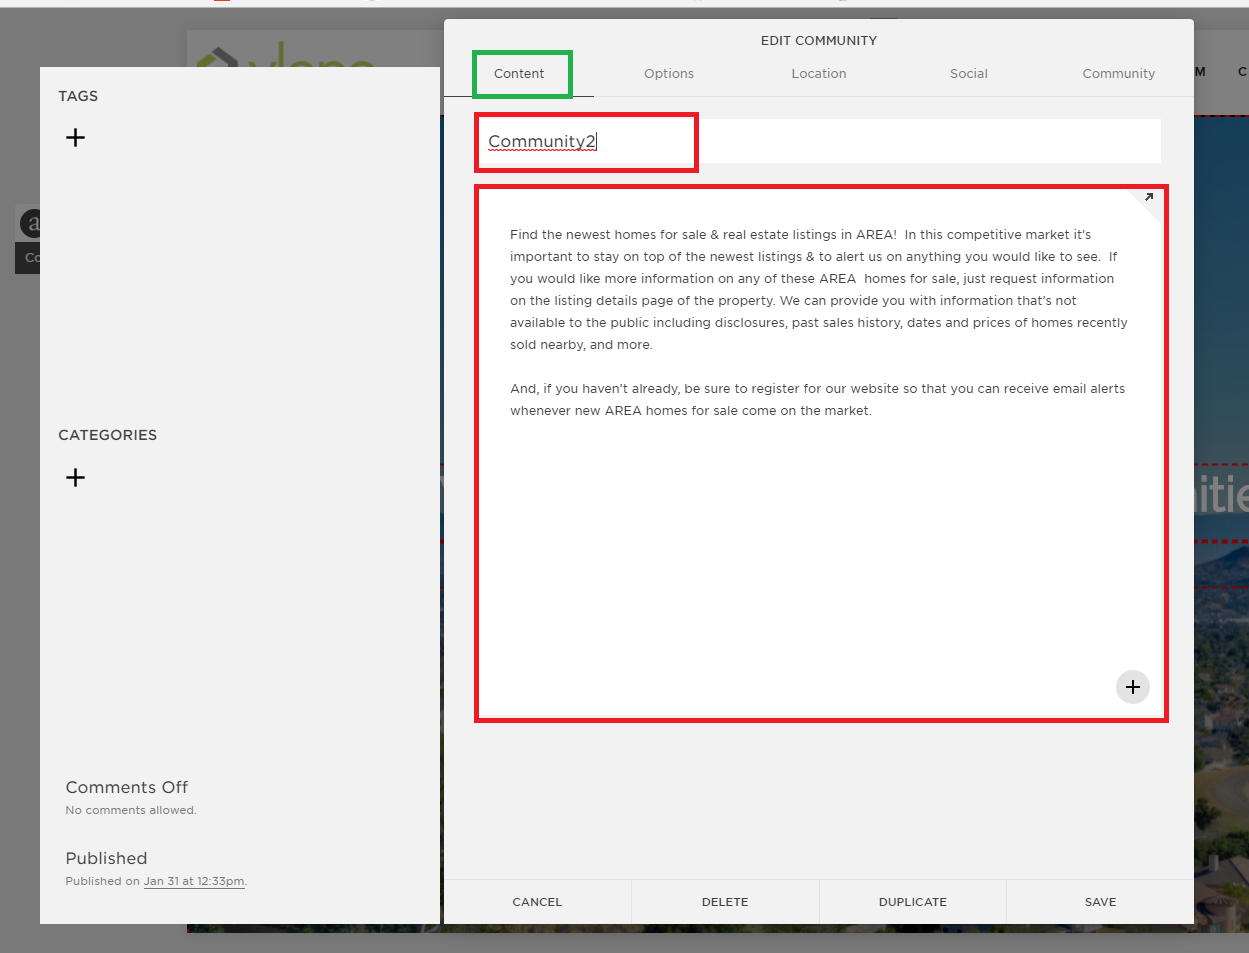
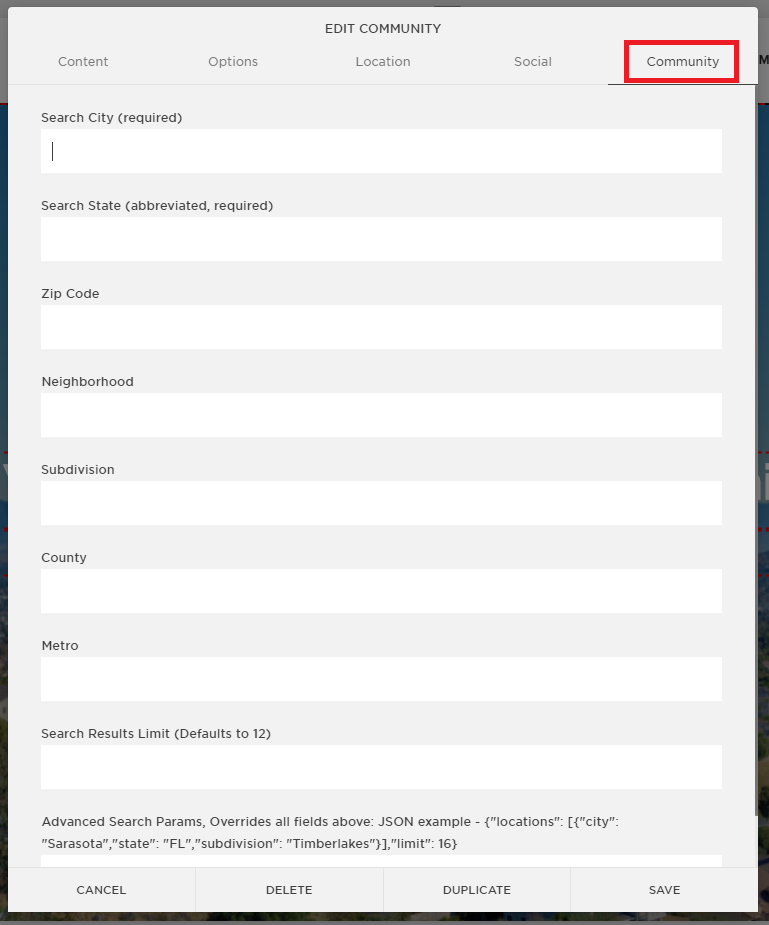
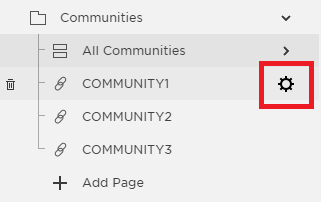
To edit a specific community page, hover from the community pages on the left side and click on the gear icon.

An Edit Community window will pop up on your screen.
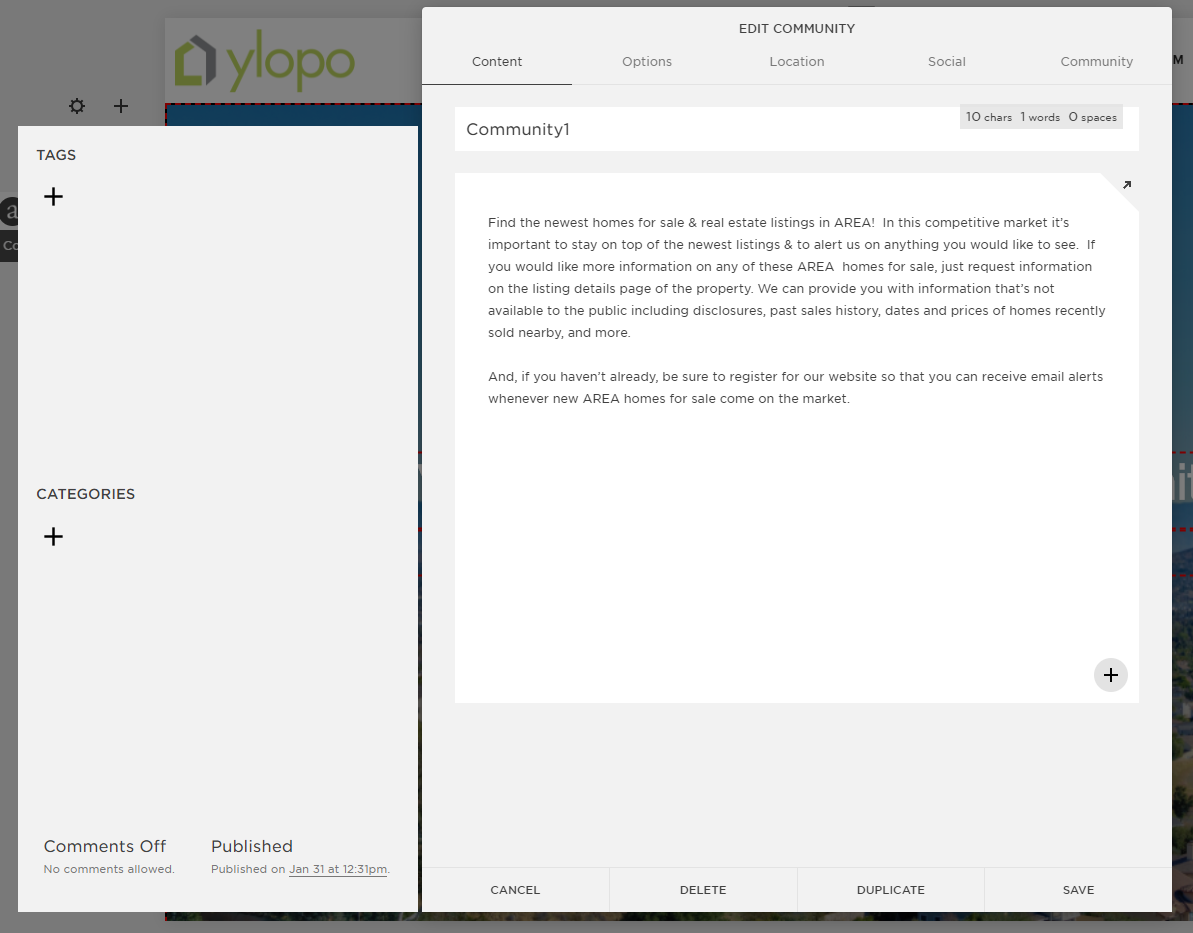
From the Content tab > Replace the first box highlighted in red with the Community Name/Area. Then replace the community description with the community description generated on the Excel file.
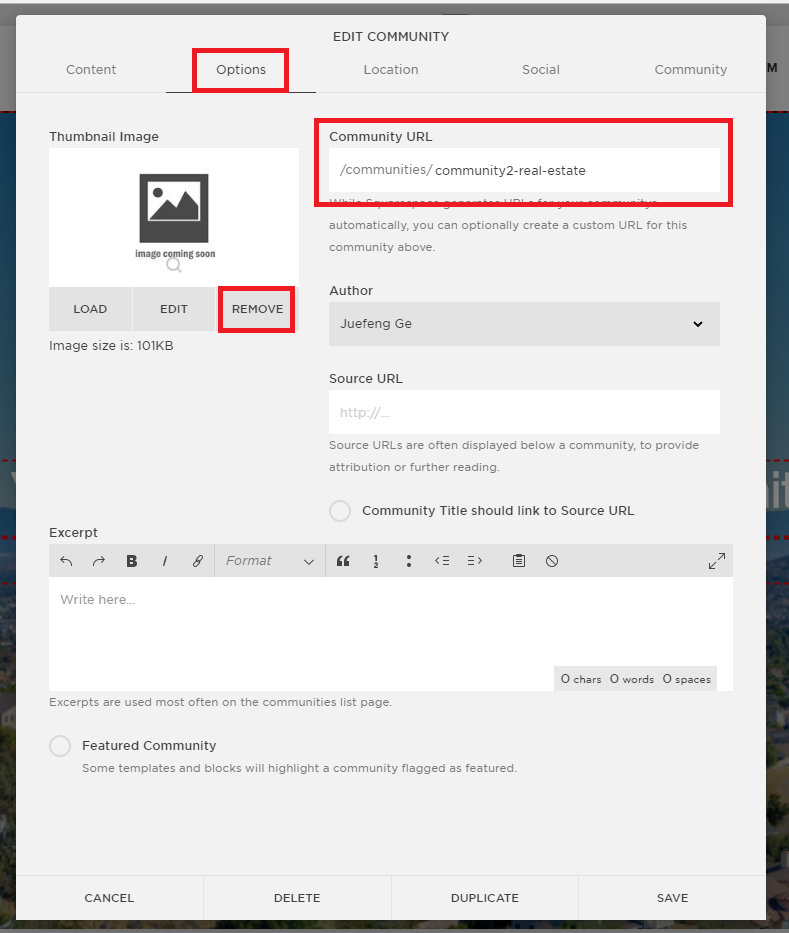
Next, go to Options tab > 1. Replace the image by clicking Remove and selecting “Add an image” (The images we are uploading for the community pages are basically house images based on the area. You can make a search and download the appropriate photo from Shutterstock.com) 2. Copy the specific community slug and replace the existing Community URL.
Next move to the Community Tab. The information we need to use for this is based on the verification you made on the Home Search site earlier.
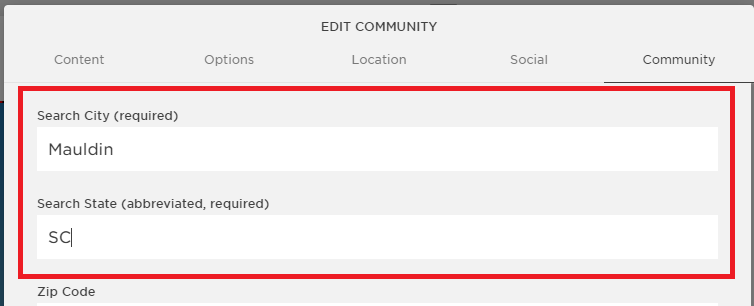
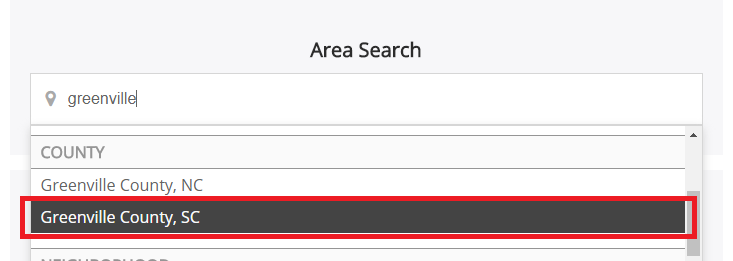
For an instance, the community page we are setting up is for Mauldin, SC. In the screenshot below, Mauldin is shown as a CITY under the State of SC.
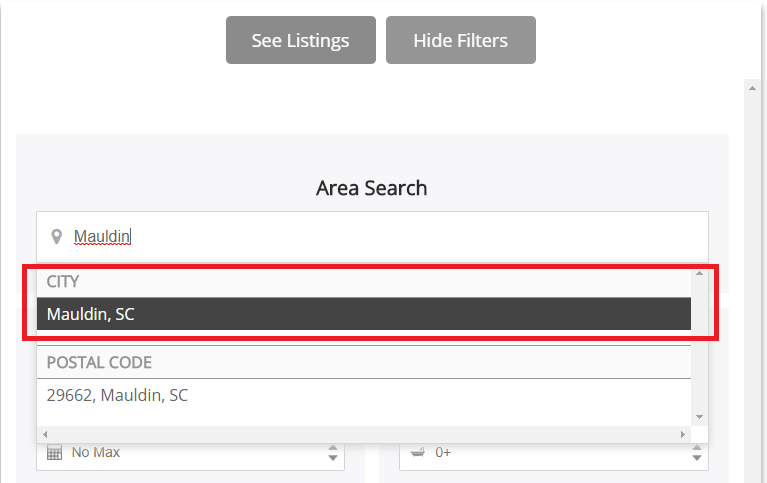
In this case, we will specify the Mauldin as City and SC as the State in the Community Tab. See the image shown below:
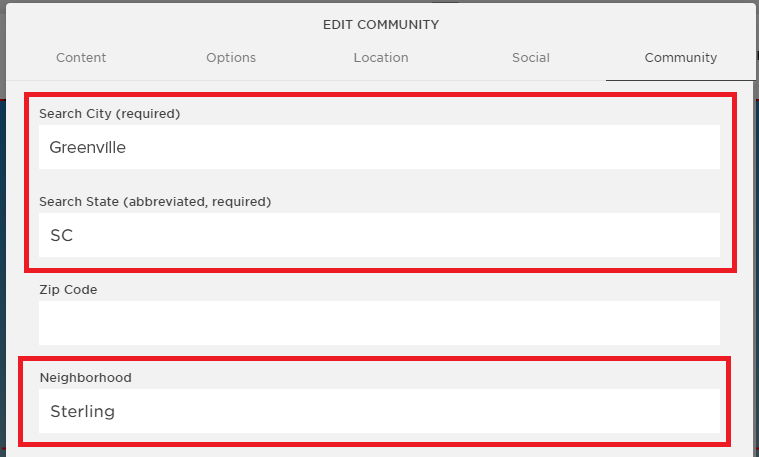
For an area that is found to be a neighborhood like Sterling, Greenville, SC:
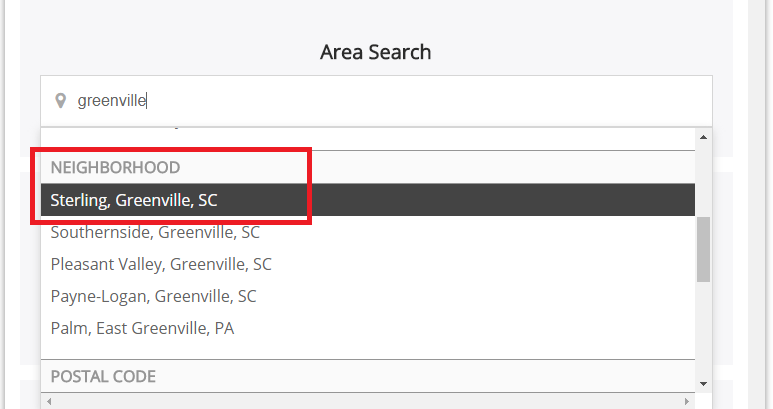
Specify it on the Community Tab like this:
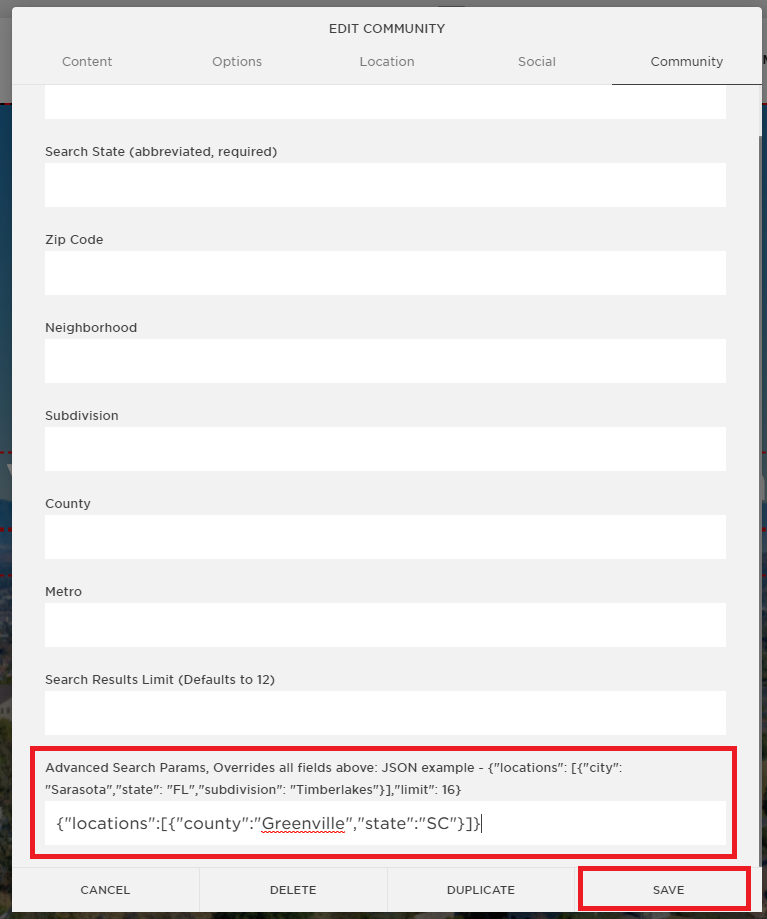
For Counties and Zip Codes like Greenville County, SC, it is recommended to get the See Listings code of this area.
Code as follows:
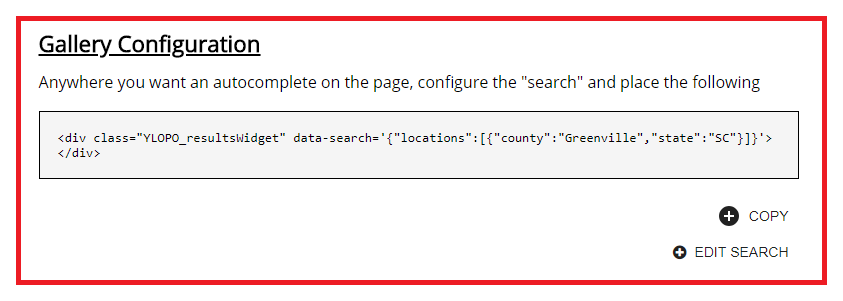
We will add this to the last text box option on the Community Tab, which is the Advanced Search Params that override all other fields. We can leave all other fields blank if we will supply this code in the last text box. Make sure to copy only the code enclosed with the first and last braces, and click SAVE.
Ex. {"locations":[{"county":"Greenville","state":"SC"}]}
After adding the necessary details of each community, we can now continue setting up their specific pages.
To edit a page, go the the main Communities page and click on a community (shown in a tile layout)
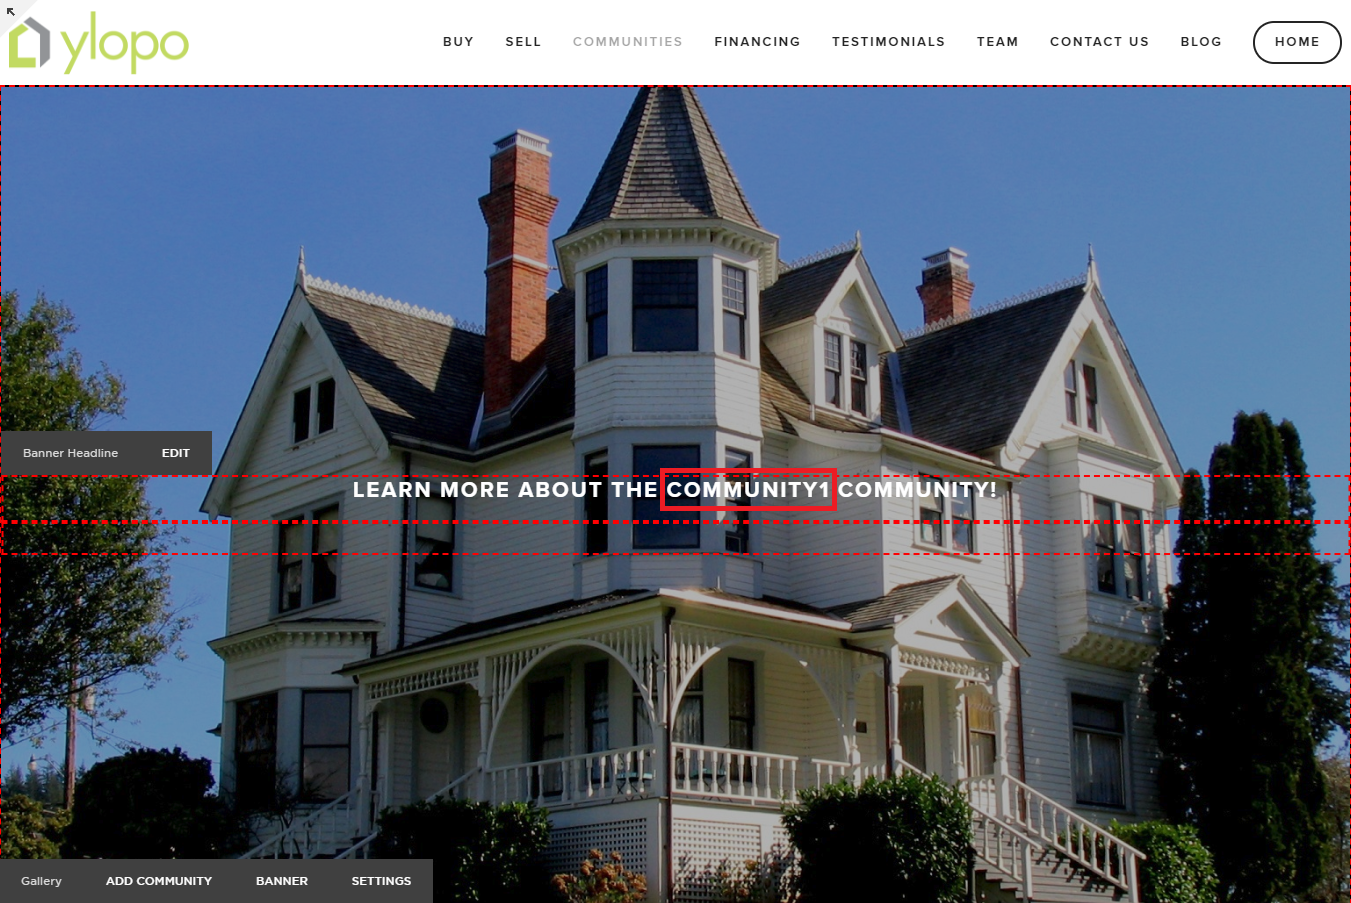
On a specific community page, first change the texts on the Banner section. The label LEARN MORE ABOUT THE COMMUNITY1 COMMUNITY! must be added to all community pages. You must replace the word COMMUNITY1 with the corresponding community name. You can copy-paste the details from the Excel file above. (Sample: LEARN MORE ABOUT THE MAULDIN COMMUNITY!)
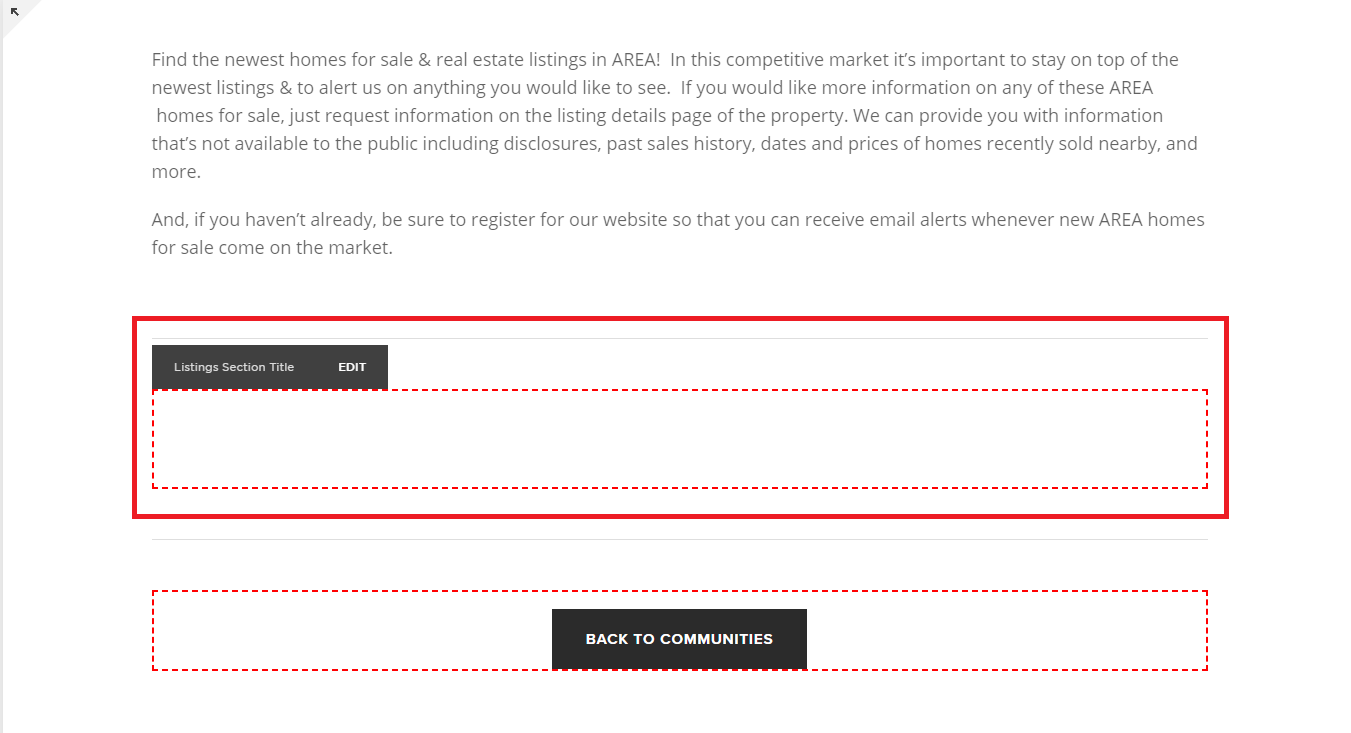
Next, scroll down and pause on the section after the community description. Hover on the highlighted section and click edit. Add the label MOST RECENT HOMES FOR SALE
This section will display the listings for this specific community (the settings we filled out on the Community tab will be the keywords for the listings that will be displayed). However, you will notice that no listings are showing up as of now. That is because we haven’t added the code injection yet (To be discussed later). It is recommended that we add the code injection after we’ve completed all the site pages so we can avoid slow-loading of the site while we are still building it.
After the MOST RECENT HOMES FOR SALE section, if you have more than three communities to set up, proceed with the BACK TO COMMUNITIES button. Hover and click Edit > Scroll down a bit, wait for the options to come out and choose to Copy Data and SAVE.
Likewise, remember that this BACK TO COMMUNITIES button is only set up for the first three default community pages that come on the template. After the third community, you will now have to manually add this or choose to Insert data (which will paste the button you just copied).

If you’ll try to edit the Back to Communities button, you’ll notice that the Clickthrough URL is linked to Communities page.
To create a new button, just click on the line Widget option > type Button > name the button BACK TO COMMUNITIES > link to Communities page > and then SAVE.
Next, click on the BACK TO COMMUNITIES button to return to the main Communities page. Continue editing the rest of the community pages using the same process.
------------
After you’re done setting up the Communities pages, it is now time to add all the community links as a dropdown on the navigation. If you notice on the main navigation on the left side, under the communities page there are three default links for the specific community pages.

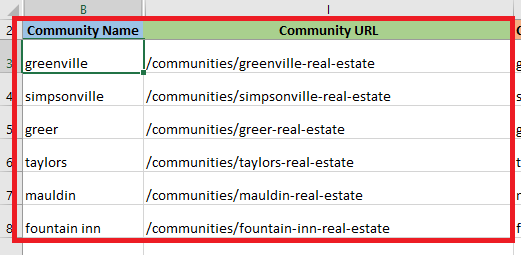
All we have to do is add all the communities we’ve added on the main communities page to this dropdown section. To do so, open again the excel file with our generated results. On the excel file, we will only use the community name and community url to complete the dropdown set up.
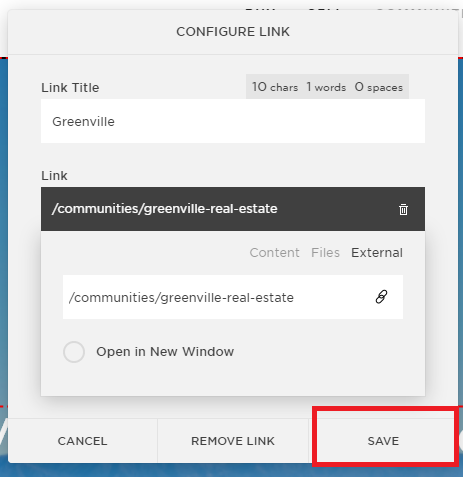
For the first three links provided as default on the main navigation, simply hover and click the gear icon to open.
Next, a Configure Link window will pop up
Simply replace the Link Title and the Link. (Copy the corresponding details from the Excel file and paste them on this small window)

It should be similar to the image shown below. Then click SAVE.
For a Communities page with more than three areas, we’ll have to manually add the dropdown links. To do so, on the Communities folder under the Main Navigation > Choose ADD PAGE
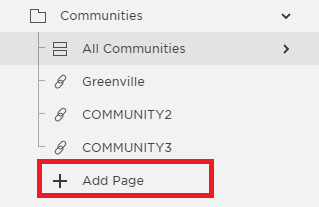
Then click LINK
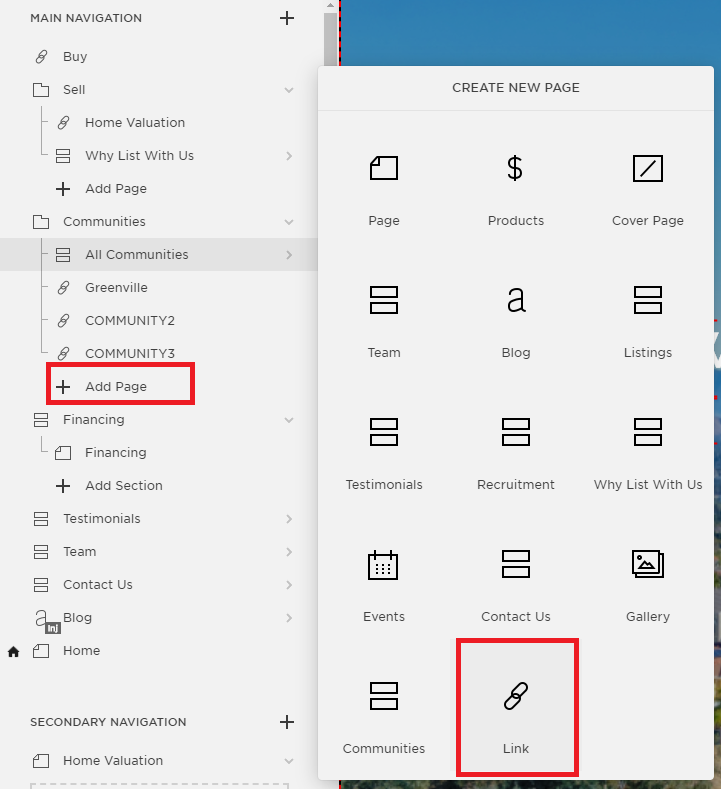
The Configure Link window will pop up and you just have to repeat the same process indicated above when adding the link name and URL.
.