

Integration of Google Chrome
This section shows the necessary steps on how to integrate the Squarespace account into Google Chrome.
As the Squarespace team uses several tools in performing their tasks, signing in to Google Chrome using the access credentials of Ylopo will help each member to acquire important bookmarks (websites and online tools) that will help them work faster and more efficiently.
First Step:
Open your Google Chrome Browser. On the Chrome's menu, click the icon with three horizontal lines in the upper right-hand corner. Then, open the Settings option.
Click the “Sign in to Chrome” option.

Second Step:
Log in using the Ylopo Google Chrome Login credentials:
Email: squarespaceylopo@gmail.com
Password: Ylopo*1234

Third Step:
Once Logged in, Click on the “Sync.” On the Advanced Sync settings, make sure to disable all options under Sync Settings.

Fourth Step:
After you disabled all the options under the Sync Settings, go back to the main Settings page. Go to Appearance section and Enable the “Show Bookmarks bar” option.

Fifth Step:
Double check if the Bookmarks bar is displayed on Google Chrome and you are all set!

JIRA
This section explains the process being done by the Squarespace team using the Jira Software.
Jira is used for client’s project management and serves as the place where the team updates each client’s task details and status.
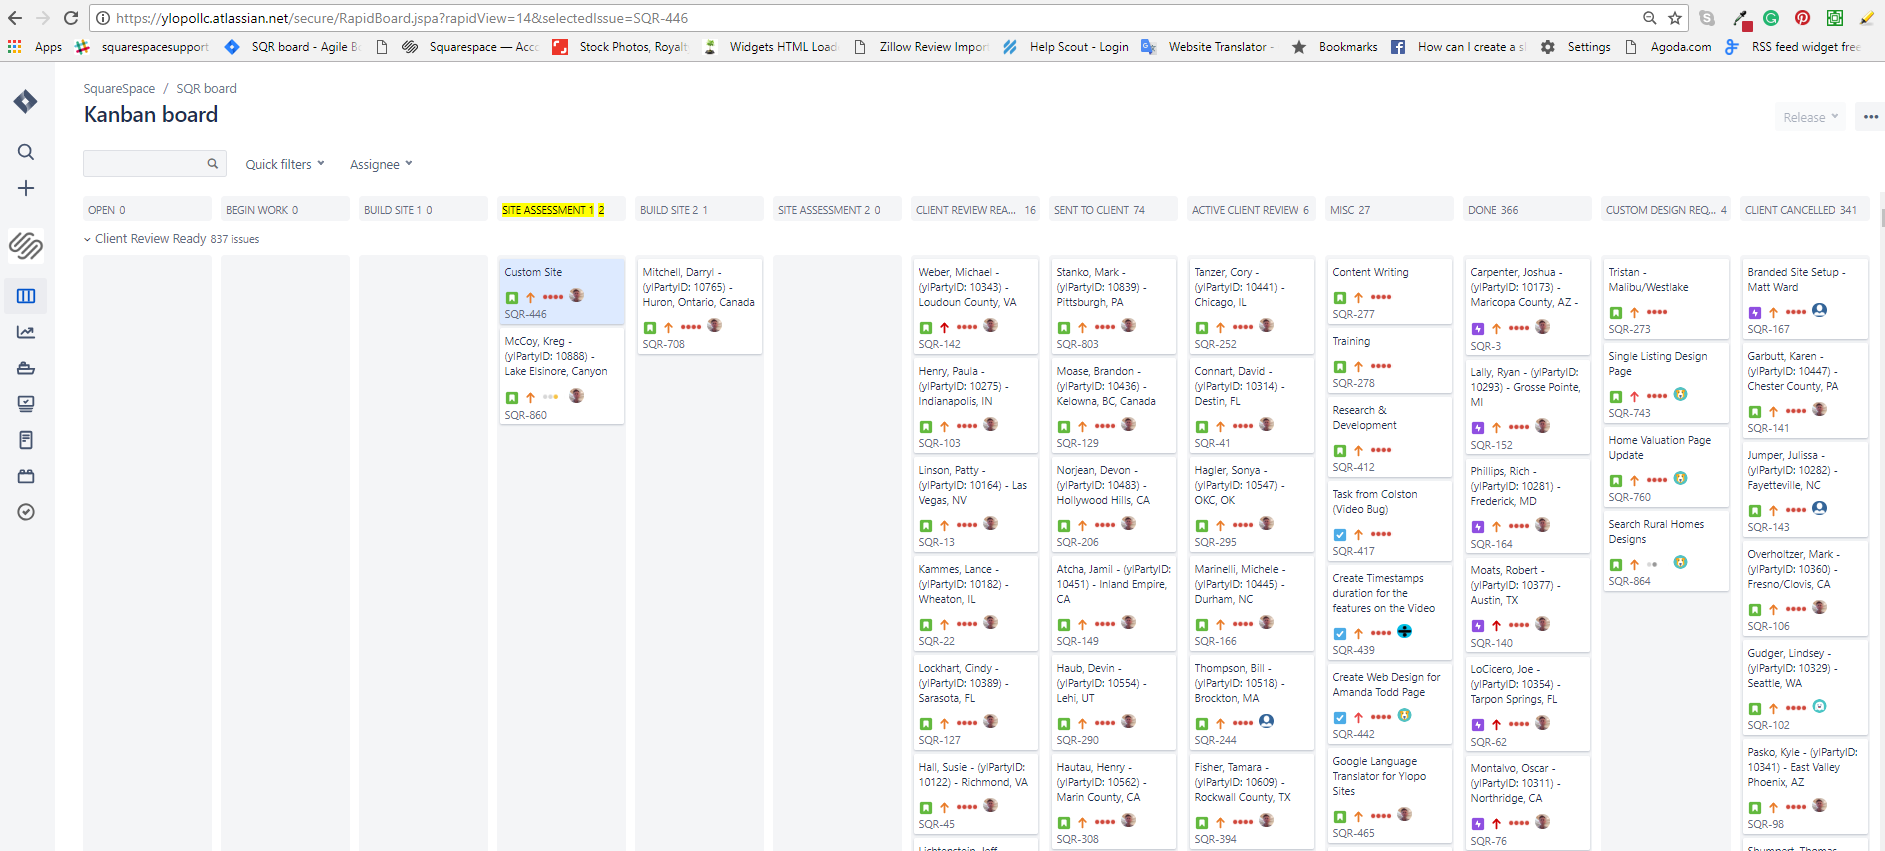
The Squarespace team has their own Software Project on Jira known as the SQR board. (See screenshot attached)

The SQR board features columns that serve as the project milestone and indicate the status of each client. The Squarespace team mostly handles the second to the fourth column of the board, mainly: (2) Begin Work; (3) Build Site, and (4) Site Assessment. But in this section, each column will be discussed.
Open

Newly created tickets by the Onboarding team are placed on the Open Column. Tickets placed in this column are basically new clients for site creation. These tickets have no information yet and details are to be added by a member of the team (Usually open tickets are done by the Squarespace Content Creation Team). The client’s information can be acquired from the Client’s Information Form on Formstack, the Client’s Base link, and from Follow Up Boss.
To edit a ticket, simply click the ticket and a window similar to the screenshot below will pop up on the screen. Click on the SQR number at the upper left corner to open:

On the ticket page, click on the Description field to add or edit any details. Don’t forget to save the changes by clicking the Check icon at the bottom of the Description field, and you are all set.

After the ticket details completion, a comment specifying that the ticket info is completed should be added as a way to inform the members about the update. You can do so by scrolling down at the bottom of the ticket page and look for the Activity section > Comments Tab.

Also, a ticket status update should be made (by the staff who completed the ticket) by simply dragging the ticket block on the SQR board from Column Open to the next column which is Begin Work.
Begin Work

After the ticket completion on the Open column, tickets are placed on Begin Work. Tickets placed on this column are basically those that are ready for site building.
Before building the client’s site, a member should set an assignee to a ticket on this status before moving the ticket from Begin Work to Build Site column.
To do so, kindly click on the ticket on the SQR Board > column Begin Work. Simply click the ticket, and a window similar to the screenshot below will pop up on the screen. Please click on the SQR number at the upper left corner to open:

Go to the Assignee section > Click Assign to me if you would like the ticket to be assigned to you or click on the Unassigned option and type the staff name that you would like to be the assignee of the ticket.

Once you have added an assignee for the ticket, you can now go back to the SQR board and drag the ticket block from the Begin Work column to the next column which is Build Site.
BUILD SITE

Tickets placed on this column are for the creation of the site’s initial draft. And it basically means that a staff is already working on building the website for the client’s ticket. Complete guide on how to build a site will be tackled on the next topic.
SITE ASSESSMENT 1
Once the initial draft is completed, the ticket is transferred from Build Site to Site Assessment 1.
The procedure for Site Assessment is to review the initial draft to make sure it’s free from any typos and issues before they will be sent to the client. In this column, a permission or login credentials are being created for clients so they can access and check the backend of their site.
BUILDSITE 2

For some client tickets, there are cases that the clients are still working with the setup of their details. And these tickets are temporarily placed in Build Site 2 while waiting for the completion of the needed details.
SITE ASSESSMENT 2

This is the final Proofreading before sending the initial draft site to the Client.
Sent to Client

After the Site Assessment where the initial draft is being sent to a client, this is where tickets are being transferred. Usually, tickets are placed here from one week and longer depending on the approval of the client before their site goes live. Once a client decided that they would like to launch their site, tickets are being transferred from this column (Sent to Client) to Done column.
MISC

Tickets created or transferred on this column Misc or Miscellaneous are basically for the tasks of the staff that are not focused to a specific client's ticket like meetings, research and such.
CUstom Design Request

Client tickets with Custom Design Request are placed on this column and usually done by the Squarespace Design team.
Client Cancelled

Cancelled clients are moved to this column.